Chocolate Fudge Walnut Brownies
Uitgelicht onder: Moderne Bakfavorieten
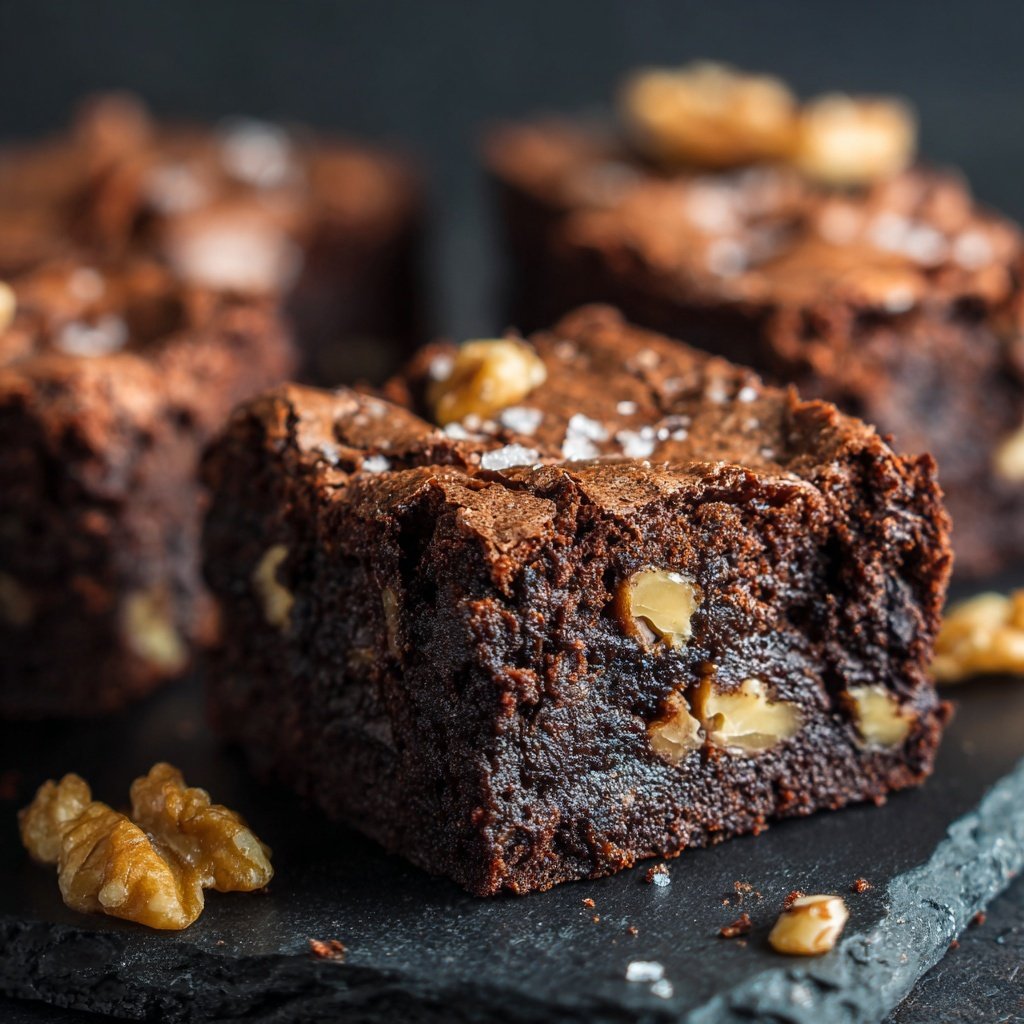
I love making Chocolate Fudge Walnut Brownies because they are the ultimate treat when I crave something rich and fudgy. Every bite is packed with decadent chocolate flavor, complemented by the crunchy texture of toasted walnuts. Preparing these brownies is straightforward and rewarding; I find it hard to resist the warm, gooey middle fresh out of the oven. Whether I’m indulging by myself or sharing with friends, they never fail to impress. Let me share with you how to make these irresistible brownies that you’ll want to bake time and again!
When I first tried making brownies, I wanted something that was not just good, but spectacularly fudgy. After several attempts, I settled on including melted chocolate alongside cocoa powder, which brings an intense chocolate flavor. I also discovered that toasting the walnuts before folding them in enhances their nutty taste, making a significant difference in the overall experience.
Each time I bake these brownies, I can't help but indulge in the warm batter before it goes into the oven. One tip that transformed my brownies was letting the batter rest for a few minutes before baking; this helped create that perfect crackly top and ensured a dense, fudgy texture that chocolate lovers crave. Trust me, this small step is worth it!
Why You'll Love These Brownies
- Rich chocolate flavor paired with crunchy walnuts
- Creamy texture that melts in your mouth
- Quick and easy recipe perfect for any occasion
The Importance of Quality Chocolate
Using high-quality dark chocolate is crucial for achieving that rich flavor profile in your brownies. I recommend opting for chocolate with at least 70% cocoa content—it balances sweetness and bitterness perfectly. If you have difficulty finding suitable chocolate, bittersweet chocolate chips can be a good substitute. Just ensure that they are made from real chocolate for the best melting properties and overall taste in the finished product.
When melting the chocolate, keep the heat low and stir continuously to avoid scorching. A double boiler method works excellently for this, as it allows for gentle heating and minimizes the risk of burning. If you accidentally burn the chocolate, you may need to start over, as it will impart a bitter flavor that can ruin your brownies.
Chilling and Cutting the Brownies
After baking, it can be tempting to cut into the brownies right away, especially when you can smell that rich chocolate aroma. However, allowing the brownies to cool for at least 10 minutes in the pan before transferring them to a wire rack helps them firm up and makes cutting much easier. If you want perfectly clean edges, let them cool entirely before slicing—this can also help enhance the fudgy texture as they set.
For the best results, use a sharp knife or a pizza cutter to slice through the brownies. Wipe the blade with a damp cloth between cuts to ensure clean edges. Each square will showcase that beautiful, gooey center you expect from a delectable brownie. If you're planning to serve them later, consider wrapping them individually to keep them fresh, or store them in an airtight container at room temperature for up to a week.
Variations to Elevate Your Brownies
Looking to experiment? You can easily adapt this recipe by adding different mix-ins to tailor the flavor. Consider incorporating chocolate chips for an extra chocolate burst, or dried fruit like cherries or cranberries for a pleasant tartness. Swapping walnuts for pecans or crushed almonds can change the texture, allowing you to customize your brownies according to your taste preference.
For a flavor boost, try adding a tablespoon of espresso powder to the batter. It enhances the chocolate flavor significantly, making the brownies even more indulgent. If you're looking for a gluten-free option, substitute the all-purpose flour with almond flour or a gluten-free flour blend, keeping in mind that this might alter the texture slightly. Make sure to adjust baking time if needed.
Ingrediënten
Ingredients
For the Brownies
- 1 cup (170g) dark chocolate, chopped
- 1/2 cup (115g) unsalted butter
- 1 cup (200g) granulated sugar
- 2 large eggs
- 1 teaspoon vanilla extract
- 3/4 cup (95g) all-purpose flour
- 1/2 cup (45g) cocoa powder
- 1/4 teaspoon salt
- 1/2 cup (60g) walnuts, chopped
Bereidingswijze
Instructions
Preheat the Oven
Preheat your oven to 350°F (175°C) and grease a baking pan (8x8 inches) or line it with parchment paper.
Melt Chocolate and Butter
In a medium saucepan, add the chopped dark chocolate and unsalted butter. Heat over low heat, stirring constantly until melted and smooth. Remove from heat and let it cool slightly.
Combine the Ingredients
In a mixing bowl, whisk together granulated sugar, eggs, and vanilla until well combined. Gradually add the melted chocolate mixture, stirring until incorporated.
Add Dry Ingredients
Sift the all-purpose flour, cocoa powder, and salt into the wet mixture. Gently fold the dry ingredients into the batter until no streaks remain.
Incorporate Walnuts
Fold in the chopped walnuts until evenly distributed throughout the batter.
Bake
Pour the batter into the prepared baking pan. Bake for 25 minutes, or until a toothpick inserted into the center comes out with a few moist crumbs.
Cool and Serve
Allow the brownies to cool in the pan for about 10 minutes before transferring them to a wire rack to cool completely. Cut into squares and enjoy!
Professionele Tips
- For an extra flavor boost, try adding a teaspoon of espresso powder to the batter. It enhances the chocolate flavor without making the brownies taste like coffee.
Storage Tips
These brownies can last up to a week at room temperature, but storing them in the refrigerator can extend their shelf life up to two weeks. If you prefer your brownies warm, gently reheating them in the microwave for about 10-15 seconds is effective. Just be cautious not to overheat, as this can dry them out.
If you have leftover brownies, consider freezing them to enjoy later. Wrap each square individually in plastic wrap and place them in a freezer bag. They can be frozen for up to three months. To thaw, leave them at room temperature for a couple of hours, or microwave them for a quick treat.
Serving Suggestions
These chocolate fudge walnut brownies are divine as they are, but for an extra special treat, serve them warm with a scoop of vanilla ice cream on top. The contrast of warm and cold is delightful, and the creaminess of the ice cream complements the fudgy texture. Drizzle with chocolate or caramel sauce for added flair.
For a more tailored presentation, dust the cooled brownies with powdered sugar or cocoa powder before serving. You can also garnish them with a sprinkle of sea salt to enhance the chocolate flavor, making each bite a bit more sophisticated.
Vragen Over Recepten
→ Can I use milk chocolate instead of dark chocolate?
Yes, you can use milk chocolate, but the brownies will be sweeter and less intense in flavor.
→ How do I store the brownies?
Store the brownies in an airtight container at room temperature for up to 4 days, or refrigerate for longer freshness.
→ Can I freeze the brownies?
Absolutely! Wrap them in plastic wrap and place them in a freezer bag. They can be stored in the freezer for up to 3 months.
→ Is it necessary to toast the walnuts?
Toasting the walnuts is recommended as it enhances their flavor, but you can skip this step if you're short on time.

Chocolate Fudge Walnut Brownies
Gemaakt door: Marlowe Sinclair
Recepttype: Moderne Bakfavorieten
Vaardigheidsniveau: Intermediate
Eindportie: 16 servings
Wat je Nodig Hebt
For the Brownies
- 1 cup (170g) dark chocolate, chopped
- 1/2 cup (115g) unsalted butter
- 1 cup (200g) granulated sugar
- 2 large eggs
- 1 teaspoon vanilla extract
- 3/4 cup (95g) all-purpose flour
- 1/2 cup (45g) cocoa powder
- 1/4 teaspoon salt
- 1/2 cup (60g) walnuts, chopped
Stappen
Preheat your oven to 350°F (175°C) and grease a baking pan (8x8 inches) or line it with parchment paper.
In a medium saucepan, add the chopped dark chocolate and unsalted butter. Heat over low heat, stirring constantly until melted and smooth. Remove from heat and let it cool slightly.
In a mixing bowl, whisk together granulated sugar, eggs, and vanilla until well combined. Gradually add the melted chocolate mixture, stirring until incorporated.
Sift the all-purpose flour, cocoa powder, and salt into the wet mixture. Gently fold the dry ingredients into the batter until no streaks remain.
Fold in the chopped walnuts until evenly distributed throughout the batter.
Pour the batter into the prepared baking pan. Bake for 25 minutes, or until a toothpick inserted into the center comes out with a few moist crumbs.
Allow the brownies to cool in the pan for about 10 minutes before transferring them to a wire rack to cool completely. Cut into squares and enjoy!
Extra Tips
- For an extra flavor boost, try adding a teaspoon of espresso powder to the batter. It enhances the chocolate flavor without making the brownies taste like coffee.
Voedingswaarde (Per Portie)
- Calories: 380 kcal
- Total Fat: 26g
- Saturated Fat: 15g
- Cholesterol: 195mg
- Sodium: 85mg
- Total Carbohydrates: 32g
- Dietary Fiber: 3g
- Sugars: 24g
- Protein: 6g